Thursday, May 31, 2012

Herb and Jalapeno Split Chicken Breasts

Woah what a week!! Alliterations aside...oops I did it again. I am straight up exhausted and I'm pretty sure I won an all time eating contest with myself last night (damn tacos and queso)! After my first full time week back at preschool with my new class of three year olds (dear lord HELP ME!) and trying to fit in work outs I feel like I have been dragged through the mud, beat up, and deprived of sleep and nutrients...none of which actually happened. Back to business. I did a lot of cooking at the beginning of the week so I'm playing catch up right now. This chicken is so tasty and such a great value. It was on sale for $0.99 per pound so I got 3 HUGE split chicken breasts for less than 3 dollars! There is such a difference with a split chicken breast and a boneless skinless. Split chicken (or chicken on the bone) takes more time to cook but has so much more flavor! It's also usually cheaper because of the bone, making it more intimidating. I only cooked one and it had so much meat that I was able to shred it from the bone and save for chicken enchiladas I am making tomorrow. If you have never ventured into chicken on the bone you must try! It can be done so many ways, on the grill or in the oven. Basically throw in on the heat and walk away until it's done. I started by grilling the chicken but halfway through I ran out of propane (of course!!) so I finished in the oven. Either way it's delicious, moist, and full of whatever flavors you infuse it with. You will not look at chicken the same way.

Ingredients
1 split chicken breast (just under 1 lb.)
1 tbsp. butter
Juice of 1/2 a lemon (or lime)
1/2 tsp. minced garlic
1 tsp. (each) fresh minced basil, lemon thyme, and parsley (this is what I have in my garden so use whatever you have on hand)
1/4 of a jalapeno, finely diced (remove seeds if you don't like it hot)
Salt & Pepper to taste

Combine the butter, lemon juice, garlic, and herbs in a bowl. Season the chicken breast on both sides with salt and pepper.


Gently pull the skin of the chicken up and slide the knife against the breast to loosen the skin (but NOT remove it). 


Take the butter and herb mixture and rub into the pocket under the skin. 


Heat the grill to high (or the oven to 400 degrees). Once the grill is preheated lower to medium high and place skin side up.


Grill for about 25 minutes and flip over. I like to cook mainly skin side up to avoid grill flare ups so I just turn for long enough to cook the fat in the skin. If you are using the oven you don't need to flip. It's going to take about 45 minutes to cook through. I use a meat thermometer to check (looking for about 160 degrees) or cut it open and make sure there is no pink.


Wawawooie (as B would say)! The herbs and jalapeno give the chicken a spicy and juicy flavor that speaks for itself. Here's all the chicken I was able to shred from the leftovers. Stay tuned for chicken enchiladas (Friday!?).

Sunday, May 27, 2012

New Orleans Style BBQ Shrimp

I don't want to trick you but this has NO barbecue sauce. Can I tell you how many times I had to type barbecue to get the spelling right? Hello Master's in Early Childhood Education, what are you teaching me! And where is the "Q" in barbecue. So misleading! I saw this recipe on my usual Friday night routine of watching "Diners, Drive-ins, and Dives" on Food Network...yeah that's right, that is what I do on Friday nights! Usual side note: I am watching My Big Fat American Gypsy Wedding on TLC right now. Are you watching this!? You need to. This episode is in SC and I have to go there. So OFF TOPIC!!! Back to reality. We have amazing shrimp here in South Carolina. They are absolutely huge and reasonably priced. There are so many ways to make "skrimps" and I was trying to push out of the box of peel 'n eat, and shrimp tacos. I heart them both but wanted to switch it up. This recipe is so easy, maybe 10 minutes total. I used it more as an appetizer because I only got a 1/4 lb of shrimp to fit my tiny, tiny budget and fear of wasting good food. To stretch your budget serve over grits, rice, pasta, or mixed veggies. It's phenomenal. I don't know if you can make shrimp taste "bad" anyway. Ask Bubba Gump.

Ingredients (1 appetizer portion)
1/4 lb. large shrimp (shells on, deveined)
2 tbsp. butter
1/2 tsp. garlic
1-2 tsp. hot sauce (I use Frank's)
1-2 tbsp. Worcestershire Sauce
1/2 tsp. low sodium soy sauce
1 tsp. fresh lemon thyme
2 tsp. fresh parsley, mined (divided, half for garnish)
Juice of 1/2 a lemon
Salt and Pepper to taste

Start by prepping the shrimp. Remove the legs and devein by running a knife across the belly to remove the grimy stuff. Keep the shell on for flavor! Sorry I couldn't take a picture of the procedure...I'm only one person!


Start the sauce by sauteing the butter, garlic, hot sauce, Worcestershire, soy sauce, herbs, lemon, and salt and pepper over medium low heat. I started tasting, and tasting, and just eating after a few. 


Add the shrimp and cook for 2-3 minutes per side or until the shrimp begin to turn pink and curl up.

Side One

On the flip side
Once the shrimp have finished cooking, remove from the skillet and pour the remaining sauce over top. Garnish with fresh parsley and lemon juice. Remove the shells and tails to eat of course! I guess if you didn't already know that you would learn pretty fast. 


And here's the aftermath. Yes I did lick the plate. Nothin' but shells and tails y'all. 

White Pizza

Happy Memorial Day Weekend!! I keep seeing people on Facebook writing "Happy MDW" and the blonde in me was like what is that!? Duhhhh! I have been cooking up a storm this weekend and have lots of updates coming! So stayed tuned! We have a tropical storm that is "supposed" to hit us tomorrow. I say "supposed" because I never believe it til I see it, just sayin' weather man! Food is the word of the weekend! I'm fresh from the grocery store with some great deals and have been cleaning out the fridge. This pizza has been one of my favorites forever. I adore pizza but sometimes the red sauce gives me heart burn. For some reason white pizza just doesn't seem as filling to me. I know it is, and it has probably twice as much cheese but I guess it's me tricking myself into believing it. This pizza was a complete throw together, "I don't know what I'm hungry for" meal and I have been eating the leftovers all day! It would be great with any veggies or chicken you have on hand but as usual I use what I have on hand and you should too! :)

Ingredients
1 store bought pizza crust (I used the one in the tube b/c that's all they had that day)
1 tbsp. butter
1 tsp. garlic (divided in half)
1/4 cup part skim ricotta
1 tsp olive oil
1 tsp. fresh minced thyme
1 tsp. fresh minced basil (extra for garnish)
1/4 tsp. red pepper flake
Salt and Pepper to taste
1/2 - 1 cup shredded mozzarella
Parmesan cheese to garnish

Don't hate on pizza crust in the tube! It's great! Unroll the pizza crust and top with garlic butter (melt butter with 1/2 tsp. of garlic). Combine the ricotta, olive oil, garlic, herbs, and spices together and spread on the crust. Preheat the oven according to the directions for your crust (mine was 400 degrees).


Top with shredded mozzarella (add some fresh if you have it one hand). Sprinkle some parmesan cheese to up the cheese factor, because there is never enough. 


Bake the pizza according the your directions. Mine was about 14 minutes. Look for the cheese to bubble and start to brown. Garnish with fresh basil and start the eating extravaganza!


Quick and easy! Of course I dip in Ranch dressing but it would also be delicious with a drizzle of balsamic. Pizza Pizza!

Tuesday, May 22, 2012

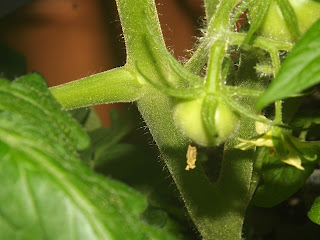
Container Garden - We have tomatoes!!

Side note from the food we have our first 2 lil baby green tomatoes from the container garden! I'm so excited and proud!! Here are the pics:


Spicy Tuna Tacos

I'm back from my brief hiatus!! Sorry! I was crazy busy at work and then I got sick. Throat infection, only eating soup sick so there wasn't a whole lot to share food wise. It has been a fun week! HA! To lighten myself up from the fact I laid on the couch the whole weekend I decided to make one of my favorite tacos from Taco Boy on Folly Beach. These are so yummy but they cost about $4 each ("market price" is code for SURPRISE!). I got this 1/2 lb of tuna for about $5 and it wasn't even on sale! I used to do these with a wet marinade but decided to try the blackening seasoning and I really loved it, and it's so easy! These are also great with mahi mahi or whatever is local, and fresh to your area. Again, it's a guide for you to play around to suite your own taste. This is SPICY!! So be ready and adjust to your taste buds. I'll help you along the way. Letsssssss go!

Ingredients
1/2 lb. ahi tuna steak
2 tsp. paprika
1 tsp. cayenne pepper
1/2 tsp. black pepper
1/2 tsp. dried oregano
1/2 tsp. Old Bay seasoning
1/2 tsp. garlic powder
1/4 head red cabbage, sliced thin
1/8 cup Japanese white sauce (I use Terry Ho's)
2 tbsp. low sodium soy sauce
1/2 tsp. prepared wasabi
Corn Tortillas
Lime wedges

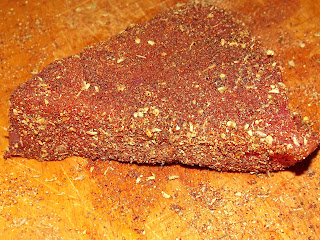
Start by preparing the blackening seasoning in a small bowl. Combine the paprika, cayenne,  pepper, oregano, old bay, and garlic powder and stir together. Coat the tuna with the seasoning and allow to marinate for 30 minutes.


In a medium high skillet sear the tuna for about 2-3 minutes per side for rare. 


While the tuna is searing slice the red cabbage into thin strips. Whisk together the white sauce, soy sauce, and wasabi together for the dressing. If it sounds too spicy you can omit the wasabi or add in a dollop of sour cream.


Remove the tuna from the pan and allow to rest for a minute or two. Warm the tortillas in the pan to soften. Slice the tuna into thin slices.

Seriously! It's beautiful

Add the tuna to the corn tortillas. I use 2 tortillas per taco because I tend to overload them. Spoon some sauce over the tuna and top with red cabbage. Add some additional sauce if you are feelin' in and garnish with lime wedges. This is such a great summery, fresh, and light meal that looks like it took a lot of time and effort!


Sunday, May 13, 2012

Asian Chicken Burgers with Wasabi Coleslaw

Happy Mother's Day!! I am a dog mom and he gave me lots of puppy kisses for mother's day :) Nerd alert! I hope you made something special for your mom or yourself! Sunday is my grocery day so I always get to eat well on Sunday nights, and don't get me started on Sunday night tv. Season finale of Mob Wives, Real Housewives, and Sister Wives!!! Can you tell I'm in a long distance relationship?? Get it together...ground chicken was on sale this week and I was determined that I could find something delicious to do with it although the idea of a "chicken burger" didn't exactly make me drool. I ate so bad this weekend and really felt physically bad because of it. My stomach was off, I felt bloated and unhappy. I forced myself onto that treadmill this morning to get back to reality. Don't be lazy!! It's amazing how much your body reacts to eating well and working out. Once you start your body will crave it! I promise you that chicken burgers, if done right, are fab! I expected a dry, flavorless patty but it was moist and spicy and the addition of COLESLAW was like angels singing! It made the burger have a spice and crunch that sent it right over the edge. Coleslaw goes with everything in my world. You will not be disappointed by this healthy alternative to a greasy burger (although delicious in moderation). Simple alternatives to classic meals with make you feel satisfied and you won't feel like you are missing out!

Asian Chicken Burger Ingredients (makes 2 burgers)
1/2 lb. ground chicken
2 tsp. minced ginger
1 tbsp. scallion, diced
1-2 cloves garlic, diced
1/2 juice of a lime
1/2 cup panko breadcrumbs (start with less and slowly add to bring mixture together)
1 egg yolk
Pea sized squirt of prepared wasabi
2 tbsp. teriyaki marinade
1-2 tsp. low sodium soy sauce
1/4 tsp. salt, pepper
1 tbsp. fresh minced parsley
2 store bought kaiser rolls, or hamburger rolls of your choice

Wasabi Coleslaw
1 cup tri color coleslaw mix
1/4 cup mayonnaise
1-2 tsp. prepared wasabi (start with less and adjust according to your level of heat)
1-2 tsp. lime juice
2 1/2 tsp. red wine vinegar
1/4 tsp. sugar
Salt and Pepper to taste


In a mixing bowl, combine all the ingredients for the burger (minus the roll obviously) and lightly mix together. Be careful not to overmix or the chicken will become gummy. This mixture will be sticky and softer then a traditional hamburger. Form the patties and refrigerate for 30 minutes to 1 hour to allow the patties to thicken up and come together.


While the burgers are chillin' whisk up the dressing for the slaw. Combine all the ingredients (minus the actual coleslaw). Taste as you go and adjust seasoning for your taste. Wasabi is a creeping heat that hits the back of your tongue so start slow and work up. 


I like to keep the cabbage mixture and dressing separate until right before serving to keep it extra crunchy. 

Once the burgers are ready to go preheat the grill or grill pan to medium high. Cook the burgers over medium high for 1-2 minutes on each side then lower the heat to medium low and cook an additional 3-4 minutes per side. The chicken should not have any pink but be careful not to overcook or it will dry out. 


While the burgers are cooking broil the buns under the highest setting of your broiler until brown. Spread some of the wasabi dressing over each side of the bun while it's warm.


Mix the remaining dressing with the cabbage. Add the burger to the bun and top with coleslaw.


Goodness!!!! Check out the grand finale.


Such a yummy, light summer meal that the whole family will love!

Adapted from Food Network

Thursday, May 10, 2012

Pantry Pork Chops

I had a couple different names for this one but my dad chose pantry pork chops and I'll explain why. I am POOR right now y'all. Like the kind of poor when you have $50 until payday (which is next week) and you need gas in your car and bills need to be paid! Ahhh! Oh well! I had a lot of ideas about making stuffed pork chops with all these yummy ingredients but this girls bank account had other thoughts. So after staring at the fridge, closing it, walking away, going back and continuing to rifle through as if all of the sudden a secret garden would show up I pulled this together. I was not disappointed! This marinade is one of my absolute favorites, you know because I love balsamic. These pork chops were huge and so cheap! I have had them in the freezer for a little while when I got them for a ridiculously cheap price. They are such a great alternative to the standard chicken breast, although this recipe would be equally fabulous with it. You can still eat well on a budget!!! (Side note: This recipe was for 1 (sad face) so adjust for your serving size.)

Dijon & Balsamic Pork chops
2 tbsp. dijon mustard
1 tbsp. balsamic vinegar
1 tbsp. olive oil
1/2 tsp. minced garlic (or 1 clove)
Sprinkle of salt and pepper to taste
1 thick cut pork loin chop, butterflied
1 tbsp. fresh parsley to garnish

Mushroom Sauce Ingredients
1 cup sliced portobello mushrooms
1 tbsp. butter
1-2 tsp. olive oil
1/2 tsp. garlic
1/4 cup white wine
1/2 tsp. cornstarch
Salt and Pepper to taste

Combine the marinade ingredients and coat the pork chop in the marinade. Allow it to marinade for about 30 minutes, the longer the better. I like to save some marinade on the side for drizzling on the finished product.

My HUGE pork chop! Already butterflied!

Marinating isn't pretty but it's worth it!
Preheat the grill over high heat then lower to medium high and add the chops. Grill about 4-5 minutes per side depending on the thickness of the chop. Pork is very lean and can still have  some pink, unlike chicken. You want it to be juicy, not dry, so keep an eye on it. You can also bake these or use an indoor grill pan.

While the chops are grilling make the mushroom "sauce". Heat a large skill and add butter, garlic, and olive oil. Over medium low heat add the mushrooms and let them slowly brown and soften. 


When the mushrooms begin to brown season with salt and pepper to taste. Add the wine to deglaze the pan and reduce to a sauce. Once the wine reduces add the cornstarch to thicken and let it simmer over low heat until the pork chops are ready to serve. 

Remove the pork from the grill and spoon the mushroom sauce over top. Garnish with chopped fresh parsley (directly from my garden, so it's FREE!). I use the leftover marinade for dipping and drizzling because I love it that much!! Here's the finished meal made solely from what's on hand. It's all about using what you have and not spending a fortune for a delicious meal. I love that feeling!


With some extra sauce :)

Wednesday, May 9, 2012

Eggplant Involtini

Say what!!!! No carb lovers rejoice! It's like manicotti sans pasta. I am delirious right now...woah! Back working at the preschool plus starting the day with a run and the craziest spin class I have ever taken has made me a little loopy. Seriously, half the class quit in the middle. I really thought I would pass out after 45 minutes, but I made it! And I can't stop eating now. I made this recipe yesterday, I won't even get into the randomness of what I ate tonight. It was not "blogworthy". I'm also really excited to post this because I GOT A NEW CAMERA! I ordered it from QVC which is one of my secret behaviors. It's so bad I know but I can't help it. B was about to kill me when I told him but I am beyond thrilled with my purchase! As you probably know by now I make what I have on hand and what is on sale so this recipe was perfect after making my Grilled Veggie Sandwich and Homemade Marinara. I had half an eggplant left hanging out in the fridge and saw this recipe in a recent issue of Cooking Light. I adjusted the recipe to my taste and what I had but it is still super healthy and tasty! Perfect for your next Meatless Monday :)

Ingredients
6 thin slices of eggplant (about 1/2 small eggplant)
2 tsp. extra virgin olive oil
Salt and Pepper to taste
1/2 tsp. garlic powder
1/2 cup part skim ricotta
1 egg
1/2 lemon, juiced
1/4 cup shredded mozzarella, extra to garnish
1 tsp. or 1 clove minced garlic
2 tbsp. shredded parmesan cheese
1/2 cup marinara sauce
2-3 leaves of fresh basil, chopped or 2 tsp. dried basil

Preheat your broiler to its highest setting, mine is 500. Slice the eggplant vertically (about 1/8 inch thick). Place the slices onto a foil lined baking sheet and drizzle eggplant on both sides with olive oil, salt, pepper, and garlic powder. Bake for 4-5 minutes per side, depending on thickness.


Allow the slices to cool until they can be handled, about 10 minutes. In a food processor (or mixing bowl if you don't have one) combine ricotta, mozzarella, parmesan, garlic, lemon, and egg until smooth. 


Fill the eggplant with the ricotta mixture and roll up to look like manicotti. 


Place the rolls seam side down in a baking dish with a layer of marinara. 


Add all the rolls and cover with marinara sauce. Sprinkle extra mozzarella and/or parmesan and bake in a 375 degree over for 20-25 minutes.


Garnish with fresh basil and extra parmesan (if you LOVE cheese like me). Tell me you miss the pasta and carbs. You don't and don't you lie! This is coming from a carb lover to the core!!!


The perfect bite!