Sunday, June 17, 2012

Roasted Potatoes with Creamy Dill Sauce

Let's see what we have in the kitchen. These next few posts are part of a side dish extravaganza!! Basically me using all the things in the kitchen I have been meaning to use and didn't want to go bad. These simple recipes make the most basic dinner special and delicious! They are also healthy!! Roasted potatoes are a great healthy substitute for a mayonnaise based potato salad or a creamy, cheesy mashed potato (not that I don't love both those things). Being that it's beach season I have to find ways to lighten up the things I love, and also the things that fall in my budget. I tried this recipe out because I have a forest of dill growing in my garden and needed a way to use it before it overtook the planter. On top of that the potato I had was on it's last leg and I REFUSE to waste food. Of course I had to throw greek yogurt in there because I am now obsessed with it! I was not disappointed! I could not believe how delicious this was. Crunchy, creamy, fresh, and bright!!  Loves it! Throw it in the oven and wait for the goodness :)

Ingredients (serves 2)
1 russet potato, sliced into 1 inch cubes (would also be great with fingerling potatoes, or red bliss)
1-2 tbsp. olive oil
1 tsp. salt
1 tsp. pepper
1 tsp. garlic powder
1/4 cup plain nonfat greek yogurt or sour cream
1-2 tbsp. fresh dill, chopped
Juice of 1/2 a lemon
1 clove of fresh garlic, minced

Start by washing a russet potato and cutting it into 1 inch cubes (skin on). Preheat the oven to 375 degrees. Toss the potatoes in olive oil, salt, pepper, and garlic powder. Add the potatoes to a foil lined baking sheet in a single layer.


Bake the potatoes for about 15 minutes and turn. 


Bake for another 15 minutes (time will depend on how thick your slices are). While the potatoes are baking combine greek yogurt, lemon, dill, and garlic. Once the potatoes are finished toss in the yogurt sauce.


Garnish with fresh dill. Serve up and dig in!!! It's like a warm, crunchy potato salad. Who doesn't love that!

Wednesday, June 13, 2012

The BEST Wedge Salad

Have I told you lately that I love you, wedge salad?! I have no idea why I love wedge salads so much. I am not a huge fan of iceberg lettuce but for some reason this salad just makes me happy. It's so easy that I'd hardly call it a recipe. Basically just assembly and mixing (if you make the dressing yourself). It doesn't look like it but it makes a HUGE salad. Add some protein and you have a complete meal. I love to get this salad when I go out and have appetizers and don't want a big entree. It's not necessarily healthy (thanks blue cheese and bacon). This "recipe" is insanely simple and allows you to use what you have on hand or what you like best. I love using balsamic tomatoes because they add a freshness and acidity to the creamy salad. Making the dressing from scratch makes all the difference on this salad. It adds that something special to a few simple ingredients. Viola!!

Ingredients 
1/4 of an iceberg lettuce head (wedged with the core removed)
1/2 of a tomato, seeds removed and diced (marinate with balsamic vinegar to cover)
Matchstick carrots (I <3 them, use as much as you like)
Real bacon pieces (See above)

Blue Cheese Dressing Ingredients
1/4 cup lowfat buttermilk
1/4 cup mayonnaise
1 tsp. apple cider vinegar
Dash Worcestershire
Dash of Hot Sauce
1/4 cup of blue cheese
Salt and Pepper to Taste
1 garlic clove, minced

Try and stay with me for these difficult steps :) Mix the ingredients for the dressing together in a mason jar and shake. Refrigerate for atleast 30 minutes to let the flavors come together.

Peel the outer leaf of the lettuce off and cut the head of lettuce in half.


Remove the core by cutting diagonally around it and slice the halves into quarters.


Top the wedge with some of the dressing. Use more then you think you need because the wedge has a lot of layers! I know...FAT KID!


Add the tomatoes, carrots, and bacon.


Add a little more dressing to complete the look! I don't know if this should even be called a salad but yummmmm! Just don't eat it before every meal. 


Sunday, June 10, 2012

Buffalo Chicken Wontons

Rainy Sunday! Time to play catch up! I actually made this recipe awhile ago after making my Baked Pork Eggrolls and Asian Chicken Burgers. This was the result of some of the remaining ingredients but I promise you it's super spicy and delicious! Who doesn't love making something yummy with what you have sitting in the fridge. In my opinion if it has buffalo sauce, it's cool with me! You could get fancy and make your own blue cheese but I had the bottle stuff in the fridge so I went with that. I'm not a celery fan so I chose not to add it but if you're fan go for it! These would be a great party appetizers or a perfect snack for a rainy movie night. Sure to please!

Ingredients
1/2 tsp. olive oil
1/2 tsp. butter
1/2 tsp. garlic
1/2 lb. ground chicken (you could also use boneless skinless breasts but I had ground on hand)
1/4 cup buffalo wing sauce
2 tbsp. (1/3 less fat) cream cheese (or greek yogurt)
1/4 cup blue cheese crumbles (divided)
Salt and Pepper to taste
Eggroll wrappers sliced in half on the diagonal (or wonton but I had eggroll)
Blue cheese or ranch dressing for dipping

In a skillet over medium heat, saute garlic in olive oil and butter. Add ground chicken and cook until chicken is no longer pink. Season with salt and pepper. Add the buffalo sauce and cook for 1-2 minutes to heat through.


Add the cream cheese or greek yogurt to make the mixture creamy and cut some of the heat. Sprinkle with half the blue cheese crumbles and remove from the heat. 


Preheat the oven to 400 degrees. Allow the mixture to cool for 5-10 minutes. Place a spoonful of the mixture into the center of the wrapper and sprinkle with extra blue cheese crumbles. 


Fold the sides together and seal the top. With wet fingers pinch all seals together to create a  bundle.


Bake on a foil lined baking sheet for 10-12 minutes or until brown. Flip halfway through. Allow to cool for a few minutes before serving. They are hot, hot, hot!!

Serve up with blue cheese or ranch. Garnish with some extra wing sauce to up the spice :) Parsley would have been pretty but as usual I was STARVING!


Make sure you have a cold beverage on the side!

Thursday, June 7, 2012

Chicken Enchiladas

Have I mentioned I love mexican food? Mainly because I love cheese, and carbs. Why!!!?? Before B moved to Madagascar (joke) we used to get Mexican every Thursday night. Best cheap date night ever! I have actually never ordered an enchilada from a mexican restaurant. I get so caught up in tacos that I overlook them. I really need to branch out! I have made them at home several times and I want to be best friends with them. Me + Chicken Enchilada = Love. I always thought they were really hard to make but oh no! I used the leftover chicken from my Herb & Jalapeno Chicken Breast but you could also use a store bought rotisserie chicken or a boneless skinless chicken breast. This is the best of 2 meals with one main ingredient. Throw in the greek yogurt instead of sour cream, roll it up, bake and eat! I also use store bought enchilada sauce because it's delicious and cost me $0.89. You cannot buy the ingredients to make it for that cheap. Budget without sacrificing flavor! On a completely unrelated note: I have a large hornet locked in my spare bedroom right now. It flew in the house, I tried to spray it...missed and now here we are. I'm terrified to open the door. Just wanted to share that tidbit.

Ingredients (makes 4 enchiladas, I can only eat 2...at a time)
1 cup cooked, shredded chicken (I use the leftovers from my Herb & Jalapeno Split Chicken Breast)
4 corn tortillas
1/2 (10 oz.) can red enchilada sauce (divided)
1/2 tbsp. vegetable oil
1/4 cup diced white onion
1/4 cup plain greek yogurt (extra for garnish)
As much cheddar cheese as your heart desires
Chopped parsley or cilantro to garnish

In a nonstick skillet cook the onions in the vegetable oil until they are soft and translucent. Once the onions are ready add the chicken and half the enchilada sauce to heat through.


When the chicken is just about ready add the greek yogurt and cook for 1-2 more minutes. The yogurt adds some creaminess and pulls the mixture together. 


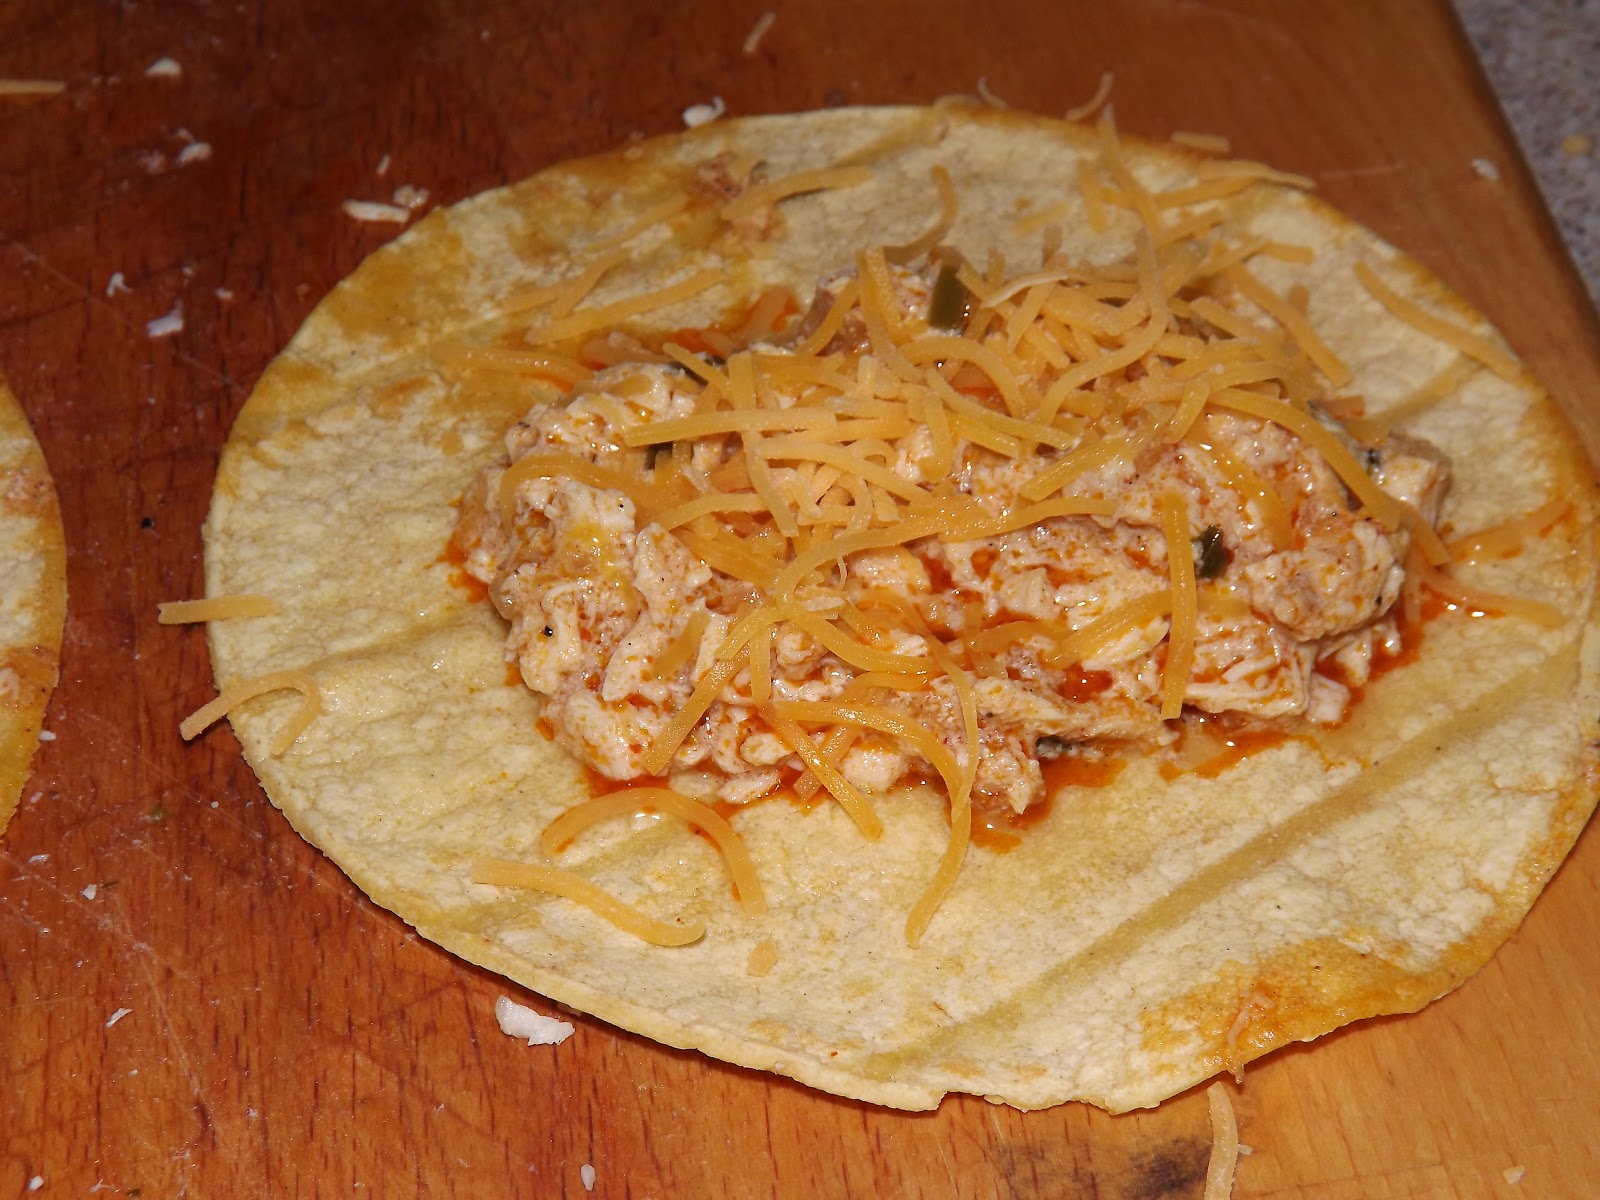
Remove the chicken from the pan and warm the tortillas until pliable in the pan drippings. Once the tortillas are ready fill with the chicken mixture and top with cheddar cheese.


Roll 'em up baby!


Preheat the oven to 400 degrees. Add the rolls to a foil lined baking pan that has also been sprayed with cooking spray. Top with the remaining enchilada sauce and more cheese, please!


Bake for about 20 minutes until the cheese is melted and the tortillas begin to brown. Remove from the oven and allow to cool before serving. Top with parsley or cilantro. 


It's hard to take a pretty picture of an enchilada. Especially when you are salivating! I added some more greek yogurt and some guacamole. Creamy, spicy goodness!!!


Saturday, June 2, 2012

A-Z Asparagus & Zucchini Pasta

See what I did there? A-Z? I didn't even plan that! I made this the other night out of randomness in the fridge and pantry after a long run. I was starving and ready to carb load! Being a grad student I have to be creative with what I have on hand but being a foodie I need to eat well. Some nights I am starving and just want to eat junk and I have to push myself to make something. Anything! Pretty much anything you make at home is going to be better than fast food (not that I don't indulge myself every now and then). This recipe can be adapted to whatever you have on hand. Add chicken, more veggies, pancetta, oh my! I normally try to make most of my sauces and things from scratch but I also weigh price issues to see what is the best deal (and doesn't sacrifice taste). For this recipe I used the new Philadelphia Cooking Creams (1/3 less fat) because it was on sale and I had a coupon!! I can't turn away from a deal. Budget budget budget! Putting it all together I'd say this recipe was under $5, and I was FULL. After a long day the simplest recipes are the most satisfying. And no fast food/take out guilt after!

Ingredients 
1 cup whole wheat penne pasta
1/4 cup Italian Herb & Cheese Philly Cooking Cream (1/3 less fat)
1/2 tsp. minced garlic
1 tbsp. olive oil
5-10 asparagus spears, chopped into 1-2 inch pieces
1/2 zucchini, shredded (I used a mandoline)

Optional Garnish: 
Parmesan cheese
Fresh chopped basil
Bacon pieces

Boil water for pasta. Cook the pasta until al dente, about 6-7 minutes. Keep a small amount of the cooking water to thin the sauce. Prep asparagus, zucchini, and basil.


While the pasta is cooking add the olive oil, garlic, and asparagus to a skillet. Cook the asparagus until soft. This will vary depending on the thickness, mine were pretty thin.


Once the asparagus are just about cooked, add the zucchini long enough to warm through, only a minute or two. 


Add the cooking cream and a teaspoon or two of the cooking water to thin the mixture. Toss in the hot pasta to coat. Plate it up and garnish with parmesan cheese, fresh basil, and some bacon pieces (I can't help myself!). How easy!! Less time than it would take you to pick up something. I think you might be able to sneak this to your kids or a picky man :)